Bridging a Fiber Account:
- Open customers MikroTiks interface.

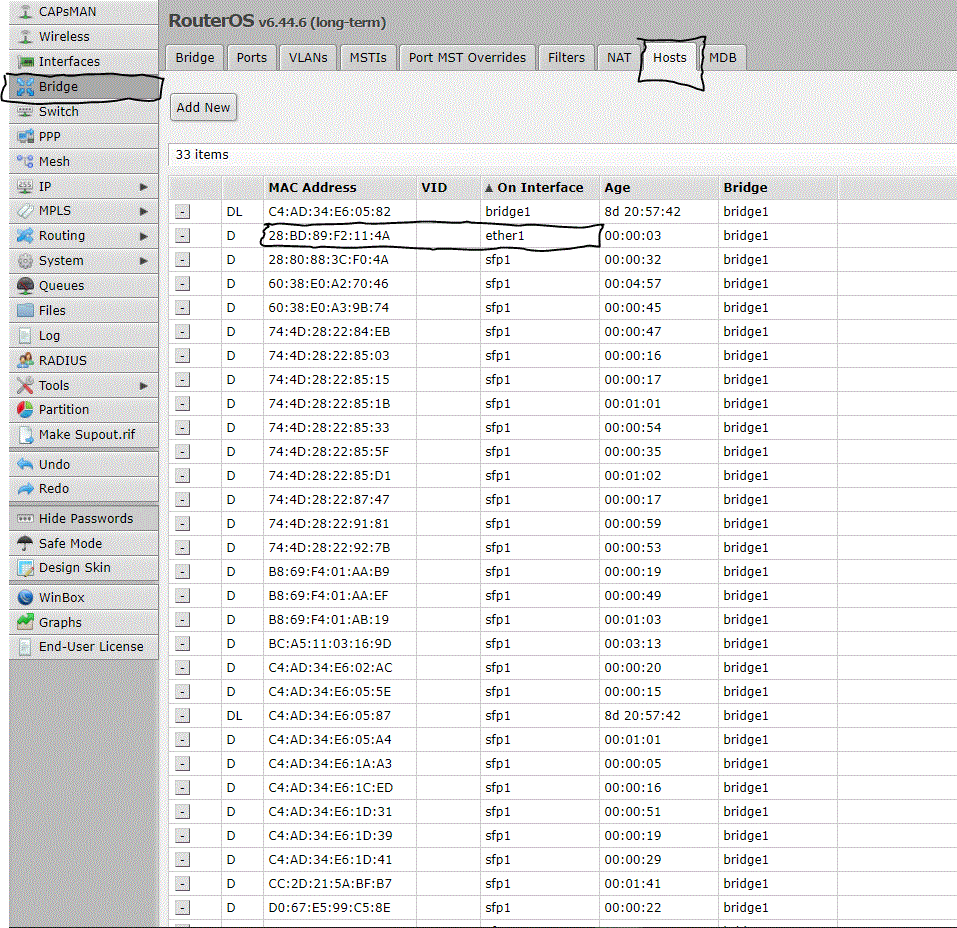
- Select “WebFig” at the top of the screen.

- Select “Bridge” on the left hand side.

- Select the “Hosts” tab on the top of the page.
- Find and copy the MAC address that is on interface “Ether1”.
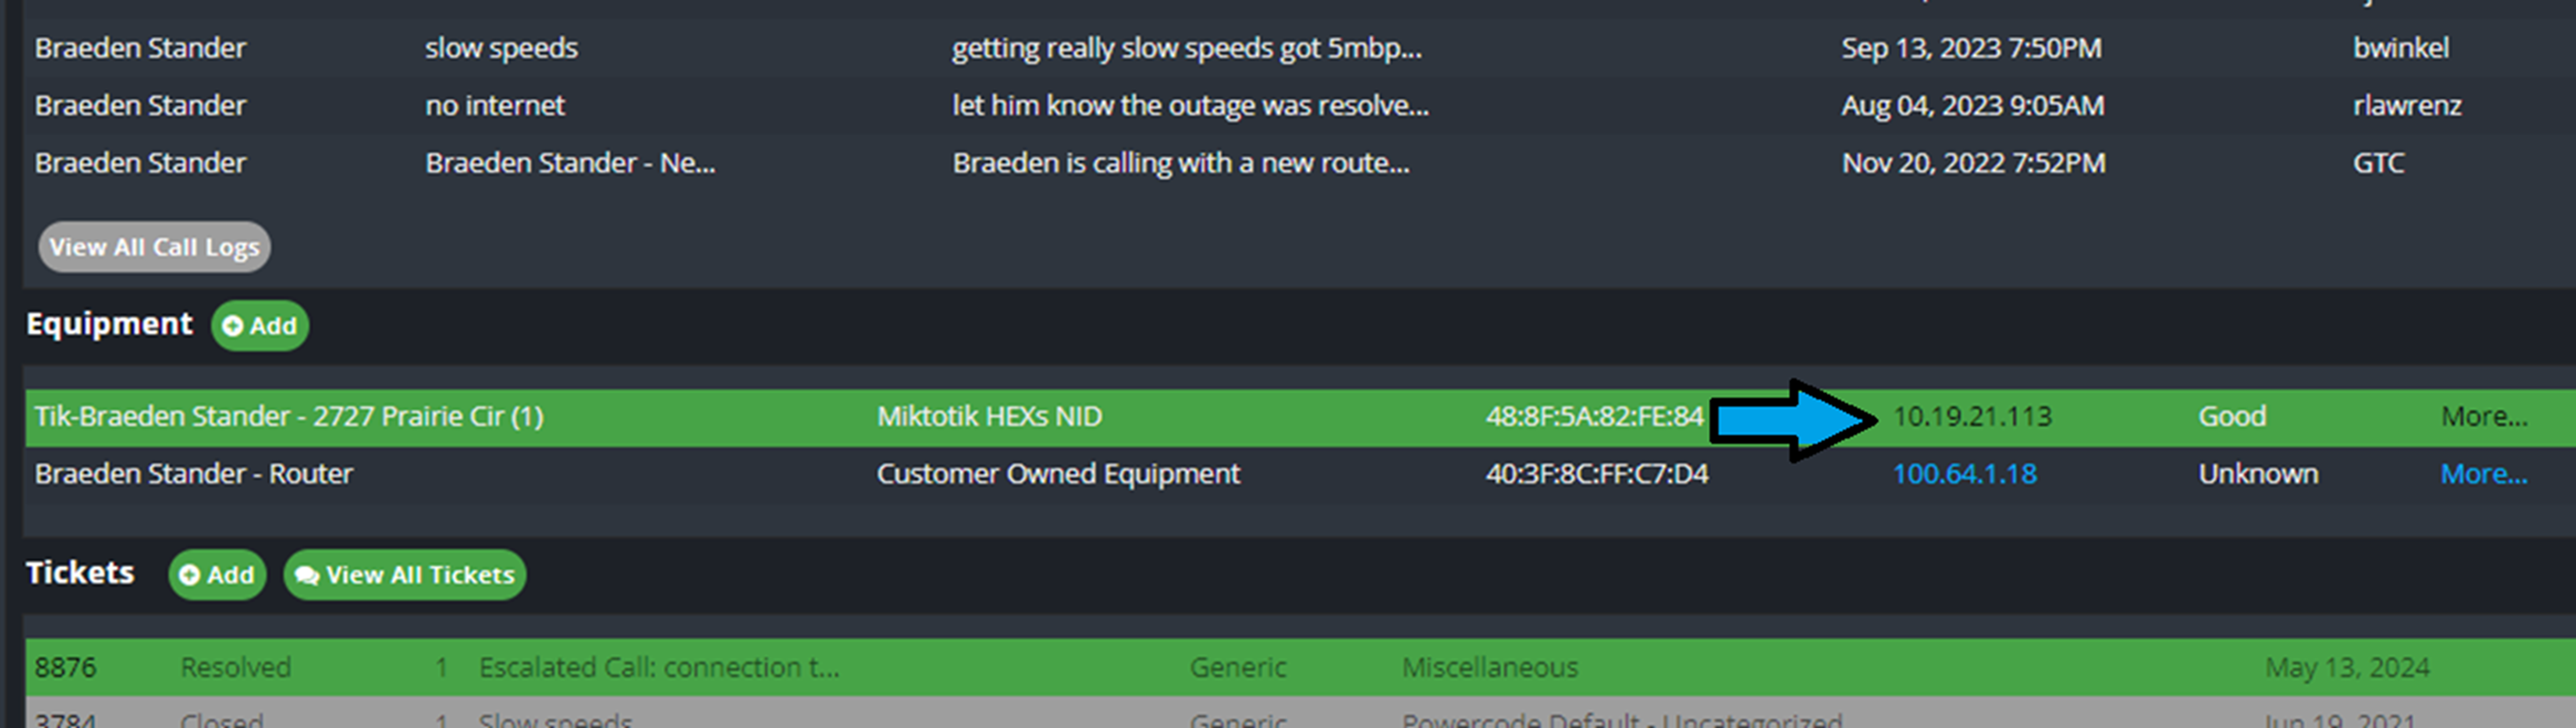
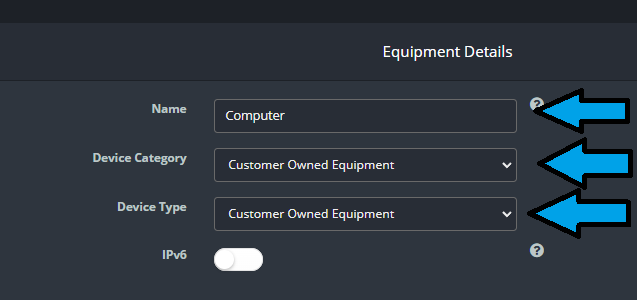
- On the customers main page in Powercode, under equipment Select “Add”.

- Select Device Category>Router
- Select Device Type> Customer Owned Equipment
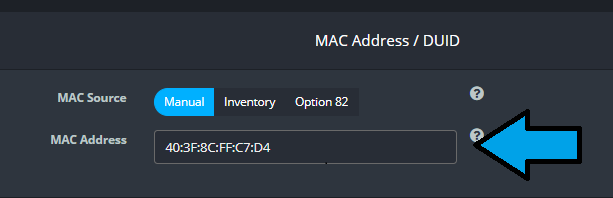
- Under MAC Address/DUID, Paste the MAC Address that was copied from the SM. The image at the bottom of the page shows the Equipment Details Page
5. IP Address Configuration:
- Select Address Range Filter: Select the correct range filter to ensure you have the correct range.
- Select “Address Range v4”: Select the correct Customer DHCP range for that customers location.
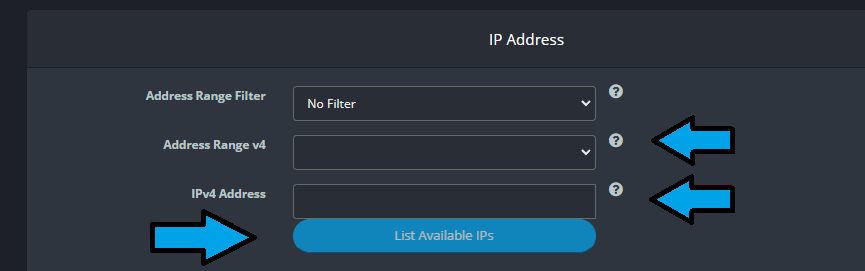
- NOTE: You can check the Mikrotik equipment details under “More” to ensure the correct Range as well as the old router if it is still on the account. Please ensure you are selecting Customer DHCP and not SM DHCP addresses.
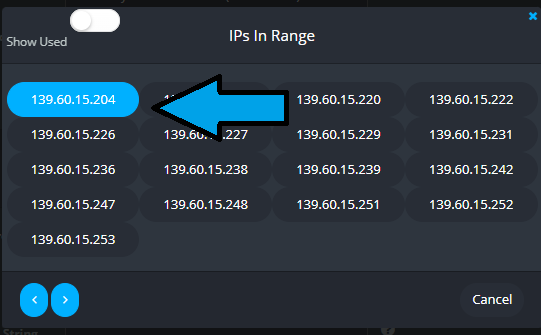
- Select “IPv4 Address”. Select one of the IP addresses from the drop down box.
Have customer reboot POE/ Equipment on site if possible. Customers are not allowed to access NID on outside of house. If reboot does not bring them back up, escalate ticket to Teir 2 surpport. Notify on call technician.