Comprehensive guide to troubleshooting a customer’s wireless connection on Optic Loop.
1) Log In to the SM.
2) Check Signal Strength
To check the Signal Strength, view the Main page of the SM, and look for Signal Strength under Status. If the dBm level is above 75, schedule a service call.
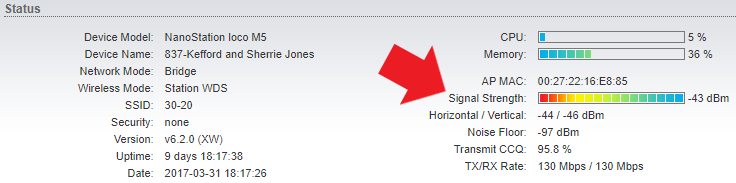
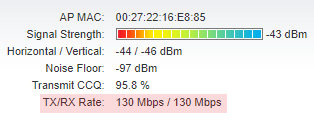
3. Check TX/RX Rate
to check the TX/RX rate, stay on the Main page of the SM, and look a few categories below Signal Strength. If either number is consistently below 78 Mbps, schedule a service call.
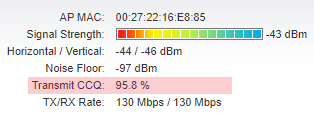
4. Check Transmit CCQ
to check Transmit CCQ, just look above the TX/RX Rate. This shows the quality of reception between the AM and AP. If this number is below 55%, schedule a service call.
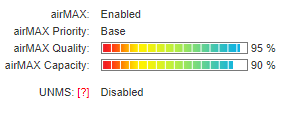
5. Check Air Max Quality
below TX/RX Rate you will find Air Max Quality. Here we can determine if there is interference in the area. If the quality and capacity are below 50%, ask a senior technician for help.
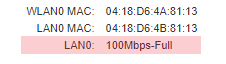
6. Check LAN0
In status, on the bottom left side you will see information on the LAN0. This is how we verify the customer has their system plugged in and potential cable errors. If this shows ‘No Link’ or ’10Base-T Full Duplex’, bypass the router and attempt connectivity. If you can’t establish a 1000 or 100baseT-Full Duplex, schedule a service call.
7. Verify MAC Address in Bridge Table
If the customer still doesn’t have service we will need to verify if the MAC address in Powercode is correct. Under the Main tab navigate to Monitor > Bridge Table. Click the Bridge Table. You will now see a bunch of MAC Address and four different categories: Bridge / MAC Address / Interface / Aging Timer. Click on Interface. This will re-arrange the table and the top result should be LAN0. Copy that MAC Address and add it to Powercode.

8. Adding a Router MAC Address to Powercode
check Knowledge Base for guide called “Adding a Router MAC Address to Powercode.”