Overview of DMZ
The DMZ, or literally, demilitarized zone, is an option in equipment that allows a device to be excluded from the firewall. If customers complain of ‘NAT Type Strict’, or something similar, the firewall is the problem. To fix this, we will place the customer’s router in a DMZ.
1) Open the CPE, and navigate to Configuration > NAT
Click on the CPE’s IP address to open it in powercode, then go to Configuration > NAT.
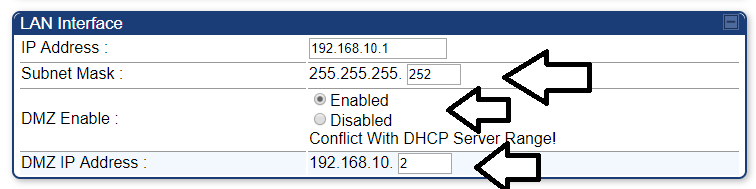
2) Configuring LAN Interface:
- Set Subnet Mask to 255.255.255.252.
- Set DMZ Enable to Enable.
- Set the DMZ IP Address to 192.168.10.2
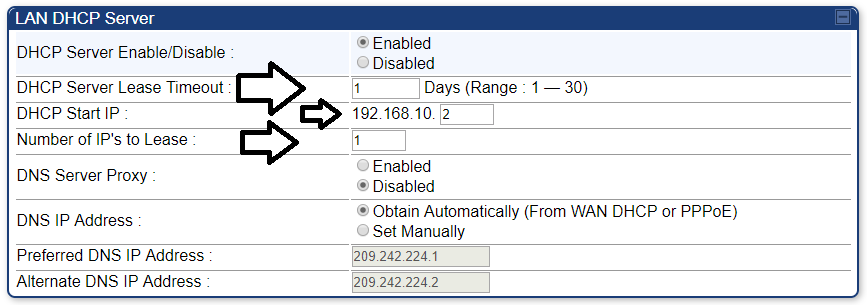
3) Configuring the LAN DHCP Server:
- Set DHCP Server Lease Timeout to 1.
- Set DHCP Start IP to 192.168.10.2.
- Set Number of IP’s to Lease to 1.
4) Save changes, and reboot the CPE.
After the changes are made, save them, then reboot the CPE. If it does not start working, have the customer reboot their router as well.