1) Log In to the SM.
2) Check the signal strength.
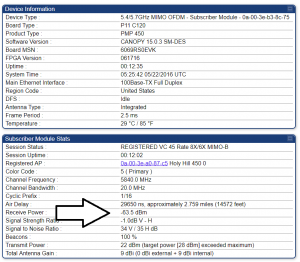
As a general rule of thumb, here is a guide to signal strength.
-60: Excellent
-65: Excellent
-68: Good
-70: Fair
-73: Questionable
-75: Poor
-78: Very Poor
-80: Abominable
If the signal strength is poor or worse, the customer will likely need a service call. Using the historical data feature of powercode, it is possible to see whether the drop in signal strength was more gradual (trees blooming in the path of the signal) or more sudden (the equipment being knocked out of alignment or jumping to the wrong AP on a tower).
To check this, click ‘More‘ on the CPE. Then, navigate to ‘Graphs‘. Once on this page, change the graph to ‘Cambium Canopy SM Signal’, then change the view to see the past 30 days of activity.
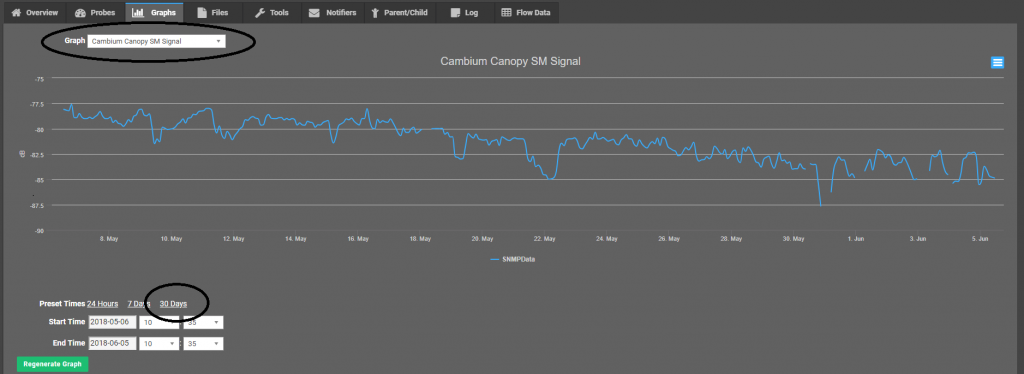
If the decline is gradual, the customer will need a service call to have this remedied, possibly with remounting or a tripod.
However, if the drop is drastic, there is one troubleshooting step that can be attempted.
Navigate to Tools > AP Evaluation, then hit ‘Rescan APs’. This will display all of the APs the SM is capable of connecting to.
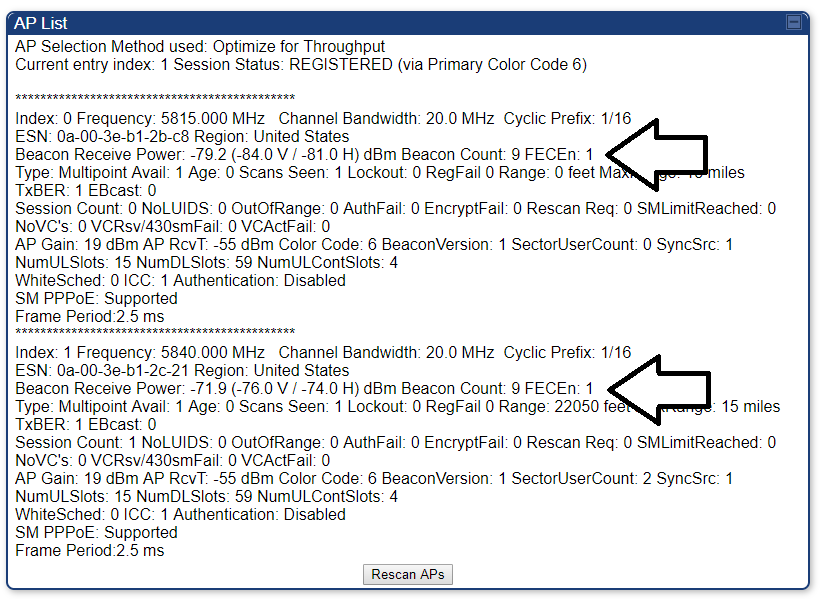
If you notice there are multiple APs listed, and a different AP has a higher ‘Beacon Receive Power’ than the current signal strength, follow the instructions below.
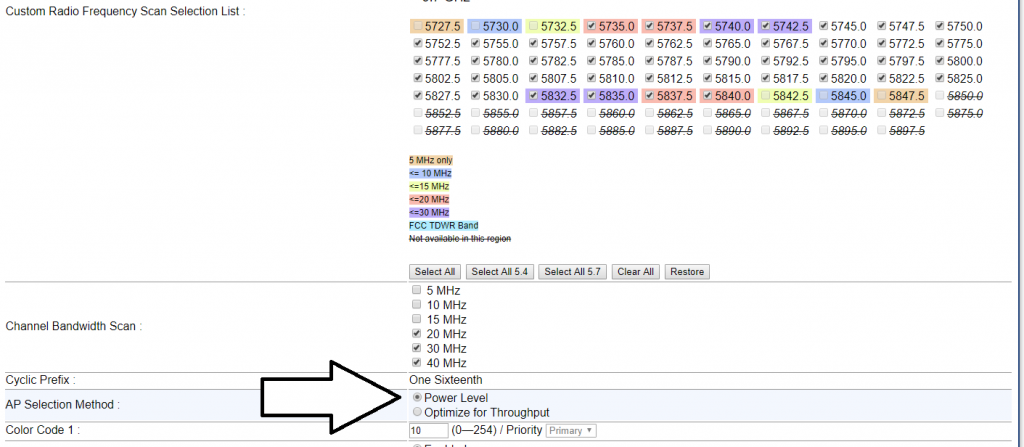
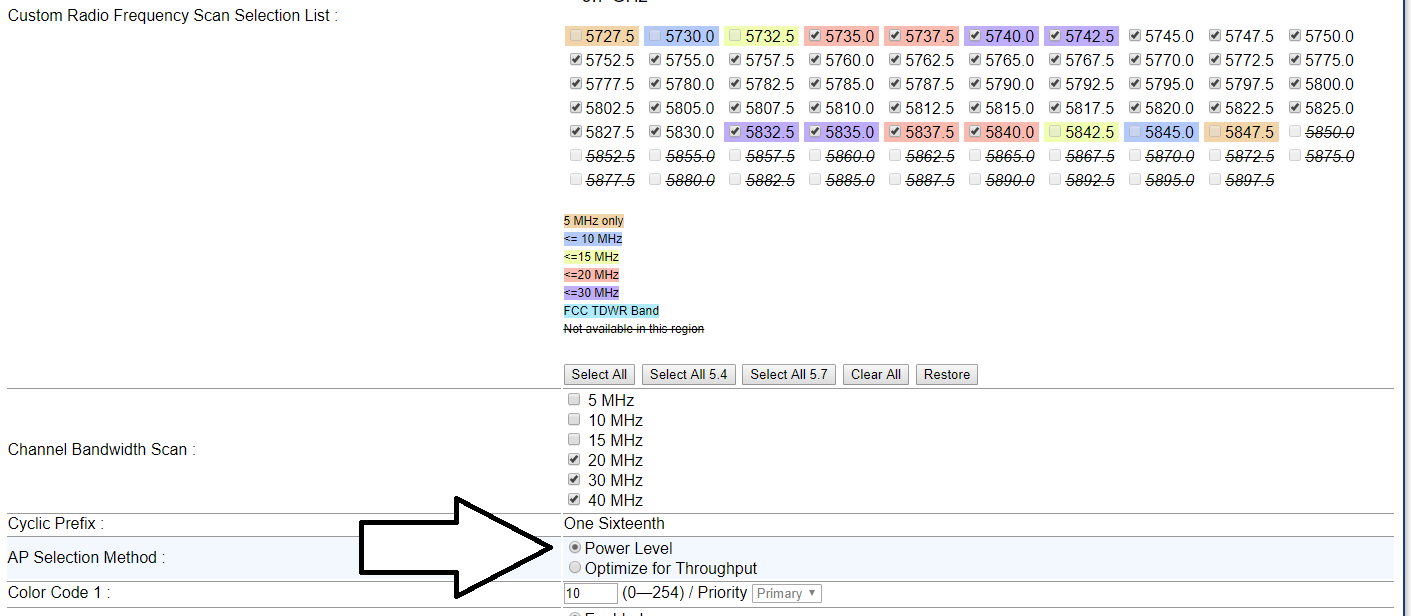
Go to Configuration > Radio, then change AP Selection Method to Power Level.
After doing this, rerun the AP Evaluation.
3) Run a Link Capacity Test
To run a link capacity test, navigate to Tools > Link Capacity Test. Ensure the test is set to Link Test with Bridging, with a duration of 10 seconds.
After running the test, the results will appear.
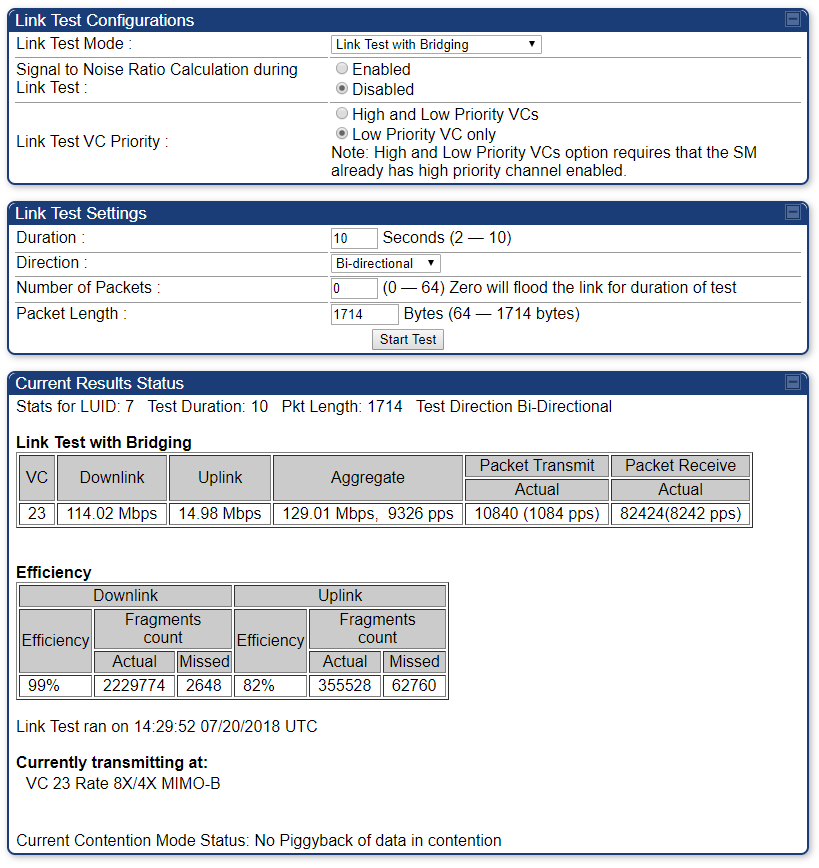
There are three parts to the results of a link capacity test: throughput, efficiency, and MIMO Status. If these results are poor, schedule a service call, and include the results in the work order.
Throughput:
Throughput measures the actual amount of data coming through the connection. This number should be well in excess of the actual speed of the connection.
Efficiency:
This metric measures the number of packets sent compared to the number expected. In practice, these numbers should be greater than or equal to 85%.
MIMO Status:
MIMO refers to how many simultaneous connections the AP makes with the SM. This metric in itself is not as important as the others, but it should be 8×2 MIMO B or better.
4) Checking Ethernet Statistics
To check the quality of the cable, navigate to Statistics > Ethernet.
The image below indicates the important areas of the statistics. 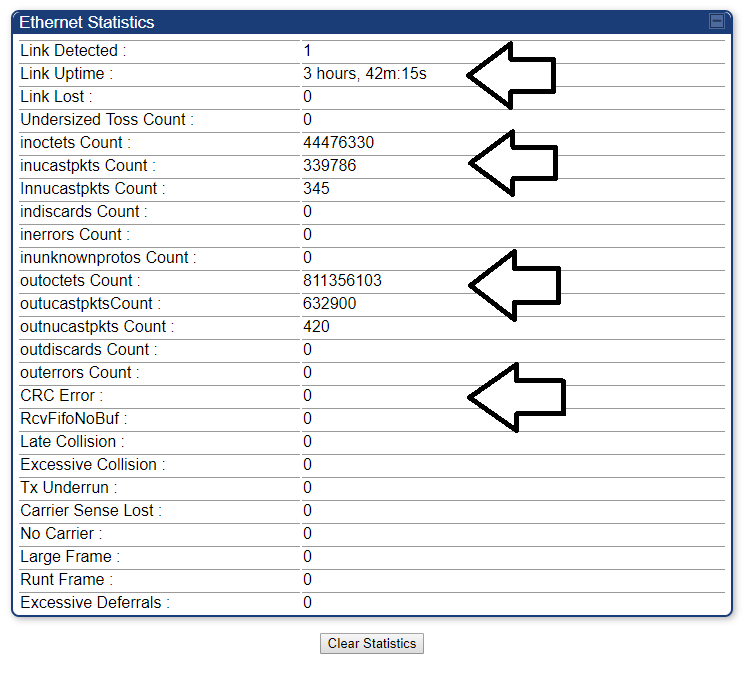
Link Detected, Link Uptime, Link Lost: These metrics refer to how many times a device has been plugged into the SM, and how long that connection has lasted.
inoctets Count: This refers to how many octets (small pieces of information) have been uploaded through the SM. These numbers will be in or over six figures when operating properly.
outoctets Count: This refers to how many octets have been downloaded through the SM. Look at this to see if traffic is running through the SM. These numbers will be in or over six figures when operating properly.
CRC Error, Carrier Sense Lost: Errors here indicate an issue with the cabling. Some (less than 500) errors are normal, but larger numbers indicate the residence needs to be re cabled. The cost of the labor can be comp’d, but the cable will be charged at 50 cents per foot.
5) Checking NAT Stats
To check the statistics of the NAT, navigate to Statistics > NAT Stats.
The important metric on this page is the ‘Out Of Resources Count’ for the Private NAT Statistics. If you’re not sure where to find this, expand the tab below.
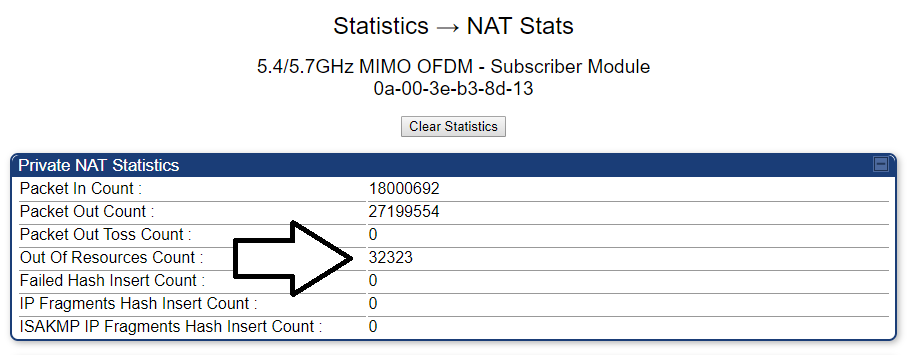
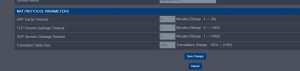
If this number is greater than five hundred adjust NAT Stats. Path: Configuration>NAT> Scroll to bottom of NAT page. You will see the image below. Adjust the numbers as follows:
ARP Cache Timeout: 8
TCP Session Garbage Timeout: 5
UDP Session Garbage Timeout: 4
Translation Table Size: 8192.
Inform the customer to see how the network functions for the next 24 hours and if she is still experiencing the same issues to call us back. If they call back with a high out of resource count, bridge the sm.
. For instructions on completing this, see Bridging an SM.
6) Checking Session Counts
It is possible for an SM to rapidly connect and disconnect from its parent AP. To check this, navigate to Tools > AP Evaluation.
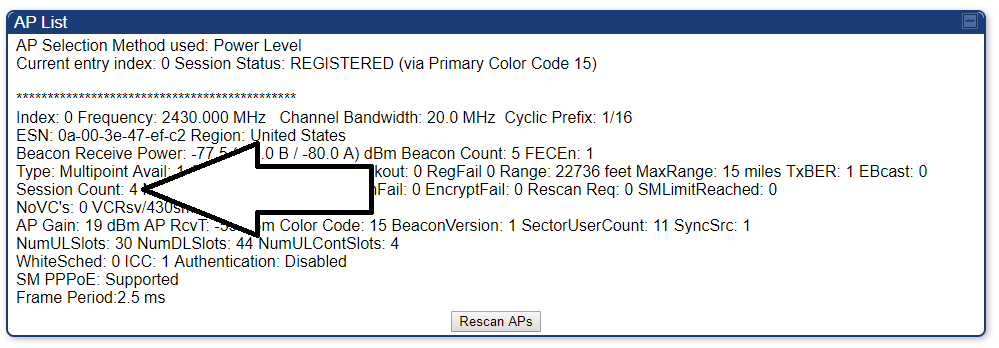
If the ‘Session Count’ is high, it is an indication that the equipment has been disconnecting and reconnecting from its parent AP.
In the event multiple APs are listed, and both have high session counts, the equipment is bouncing between them.
Go to Configuration > Radio, then change AP Selection Method to Power Level.
 After doing this, rerun the AP Evaluation.
If there is only one AP listed, and the signal strength is adequate, run a Spectrum Analysis to see if electrical interference is the issue.
The spectrum analysis tool will show all electrical signals at certain frequencies detected by the SM. It will return the result in a graphical format. The below is an example of a ‘good’ result, where the two APs are clearly isolated from the background noise.
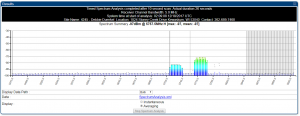
Run the test with a time of 120 seconds. Reference the frequency of the best AP as shown in Tools > AP Evaluation, and look to see if there appears to be other noise in that frequency that could be effecting the service. The image below outlines some common sources of interference.

Have the customer try to remove the offending device (unplugging a router, etc) to see if the situation improves.
If the service improves after unplugging their router, have the customer change the wireless channel on their router. I would advise using our remote assistance package to do this for them.
If the service does not improve, and they are unable to remedy the situation, schedule a service call to have a technician swap the equipment out to avoid the interference.
7) Testing the customer’s router
To ‘bypass’ a customer’s router, have them unplug the line from the customer router (the ‘main internet cable’) and plug it directly into a laptop or desktop.
Once the customer has bypassed their router, have the customer navigate to www.speedtest.net. Once there, have the customer change the server to Bertram Communications, and run the test.
If the test results come back within 2 or 3 megabits of the customer’s speed plan, let them know that speeds sometimes fluctuate when then network is under high load and we’re actively working to improve the situation.
If you have already tried configuring the SM and speeds have yet to improve try this easy step. First, go to the customers account on Powercode. Under account profile you will see a “Change Status” button. At times the backend system we use will fail to hand out appropriate bandwidth if this customer has recently changed their service plan. Reactivating an account will update the QOS automatically as well as reboot the dish to ensure it is getting its allotted speeds.
If the test results come back and are poor, consult a more senior technician.